Last updated on September 23rd 2026
HOW TO PLAN THE BEST SOUTH ISLAND NEW ZEALAND ROAD TRIP
Route, Campervan, Costs, Freedom Camping & Weather
The South Island of New Zealand is basically made for road trips. It has some of the most dramatic landscapes in the country packed surprisingly close together, with snow-covered mountains, turquoise lakes, glaciers, wild beaches, vineyards, fjords and tiny towns all connected by ridiculously scenic roads.
It is also why the South Island is so popular with campervan travellers. You can wake up near a lake, drive through an alpine pass, stop at a glacier and end the day somewhere completely different without covering huge distances.
That combination of freedom, scenery and relatively easy road-trip logistics is what makes the South Island one of the best places in the world to explore by campervan.
START EXPLORING
The Roadtrip Of a Lifetime
Planning a New Zealand road trip turned out to involve a little more homework than throwing a few pins onto Google Maps. Especially on the South Island.
Mountain passes can close because of snow. A three-hour drive can easily become five once you start stopping every ten minutes because yet another lake looks ridiculous. Freedom camping does not mean parking wherever you feel like it. And if you are travelling outside summer, the weather can completely rearrange your plans.
I planned our 10-day South Island road trip for September, travelling by campervan from Christchurch through Arthur’s Pass, the West Coast, Wānaka, Queenstown, Aoraki/Mount Cook and Lake Tekapo before looping back to Christchurch.
Milford Sound was originally part of the plan too, but we eventually decided to cut it. More on that further down, because that decision actually made our road trip a lot better.
These are the things I considered before committing to the route.
If you’re still at the beginning of planning your trip and want the bigger picture first, head over to my New Zealand South Island Travel Guide. From there, you can follow my exact route in the 10-Day New Zealand South Island Itinerary, narrow down what is actually worth seeing in my Must-See Spots in New Zealand’s South Island, or dive deeper into the logistics with my How to Plan a New Zealand Road Trip. If you’re travelling by campervan, I’ve also put together a complete Freedom Camping in New Zealand South Island Guide and a full New Zealand Campervan Tour + 10-Day RV Road Trip Cost covering the motorhome itself, how everything works and what it actually cost us.
QUICK GUIDE
Quick Guide: Things to Consider When Planning a New Zealand Road Trip
Before booking anything, I would figure out these things first:
- What time of year are you travelling?
- How many days do you realistically have?
- North Island, South Island or both?
- Campervan, motorhome or rental car?
- Do you want to freedom camp?
- Is your campervan certified self-contained?
- Clockwise or anticlockwise route?
- Which activities need fixed bookings?
- Which roads could be affected by snow or bad weather?
- How much driving are you actually comfortable doing?
- Where will you refill water and empty wastewater?
- Which campsites need reservations?
- How much flexibility can you leave in your itinerary?
That last one matters more than you would think. New Zealand is not a destination where I would plan every hour of every day. The weather has other plans.
BEST TIME
Choose the Best Time for Your New Zealand South Island Road Trip
There isn’t really one “best” month to road trip New Zealand. It depends on whether you prioritize warm weather, skiing, hiking, fewer tourists or lower prices.
We travelled in September, which is early spring in New Zealand, and after actually doing the trip, I still think it sits in a pretty nice little sweet spot. We had snow-covered mountains, far fewer crowds than you would expect during summer, late-season skiing and noticeably cheaper campervan prices. The trade-off was very unpredictable weather, which became a recurring theme throughout the trip.
Why September Is a Good Time for a South Island Road Trip
September is considered shoulder season, sitting between the winter ski season and the much busier spring and summer months.
That means you can potentially get:
- Lower campervan rental prices
- Fewer crowds at major viewpoints
- Snow still covering the mountains
- Skiing potentially still available around Wānaka and Queenstown
- Less competition for some campsites
- Longer days than the middle of winter
Wilderness, for example, currently estimates average September motorhome rates around NZ$300 to NZ$400 per day, compared with roughly NZ$650 to NZ$850+ during the busiest summer period. So yes, the difference can be pretty dramatic.
September weather definitely kept us guessing. We had sunshine, rain, cold nights, snow in the mountains and road conditions that changed quickly enough that checking the forecast became part of our daily routine. Shoulder season saved us money and gave us fewer crowds, but flexibility turned out to be absolutely essential.
So shoulder season saves money, but you need to build flexibility into your route.
THE ROUTE
Plan Your South Island Road Trip Route
Clockwise or Anticlockwise Around New Zealand’s South Island?
If you’re doing a South Island loop from Christchurch, you can essentially travel either clockwise or anticlockwise.
A simple clockwise route would look something like:
Christchurch → Lake Tekapo → Aoraki/Mount Cook → Queenstown → Wānaka → West Coast → Arthur’s Pass → Christchurch
Or you can do roughly the same loop in reverse. I chose anticlockwise.
Our actual route is a little more elaborate:
Christchurch → Banks Peninsula & Akaroa → Kura Tāwhiti / Castle Hill → Arthur’s Pass → Hokitika → Hokitika Gorge → Franz Josef → Fox Glacier → Lake Matheson → Haast Pass → Wānaka & Lake Hāwea → Queenstown → Arrowtown → Gibbston Valley → Glenorchy → Cromwell → Lindis Pass → Lake Pūkaki → Aoraki/Mount Cook → Lake Tekapo → Christchurch
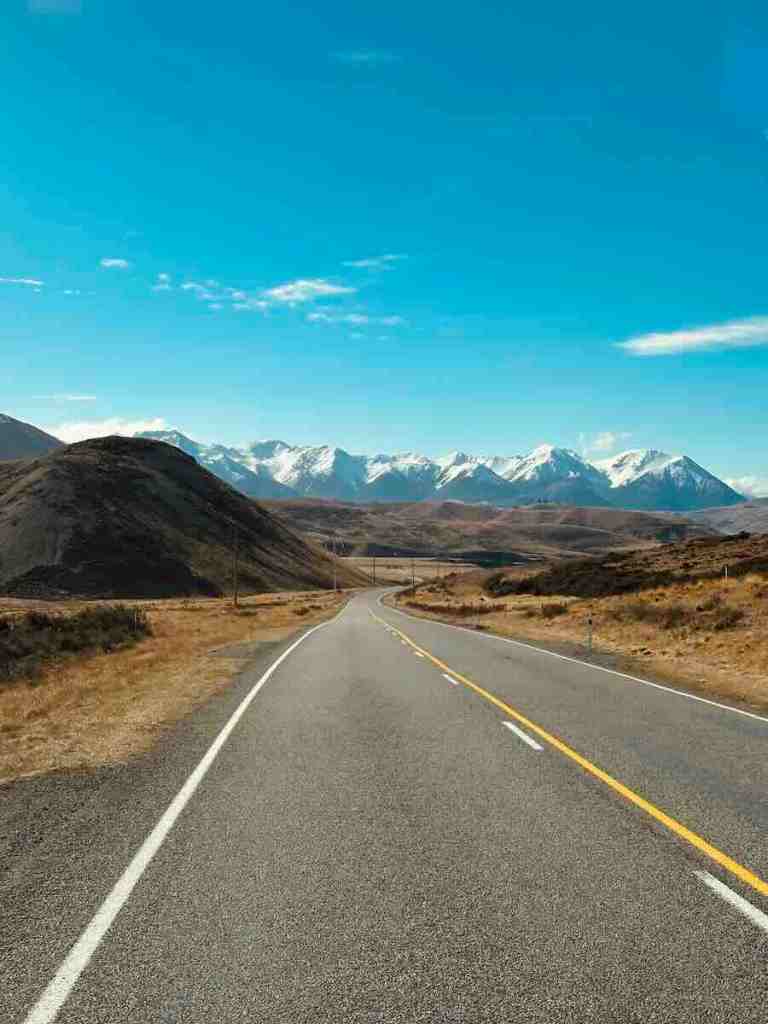
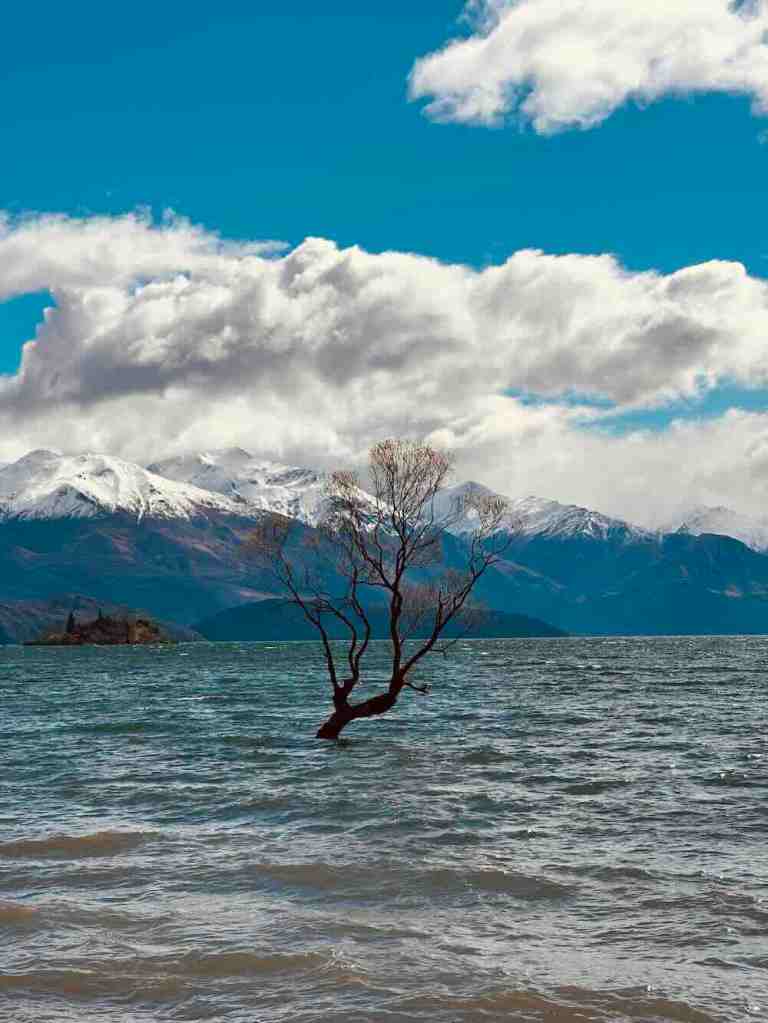
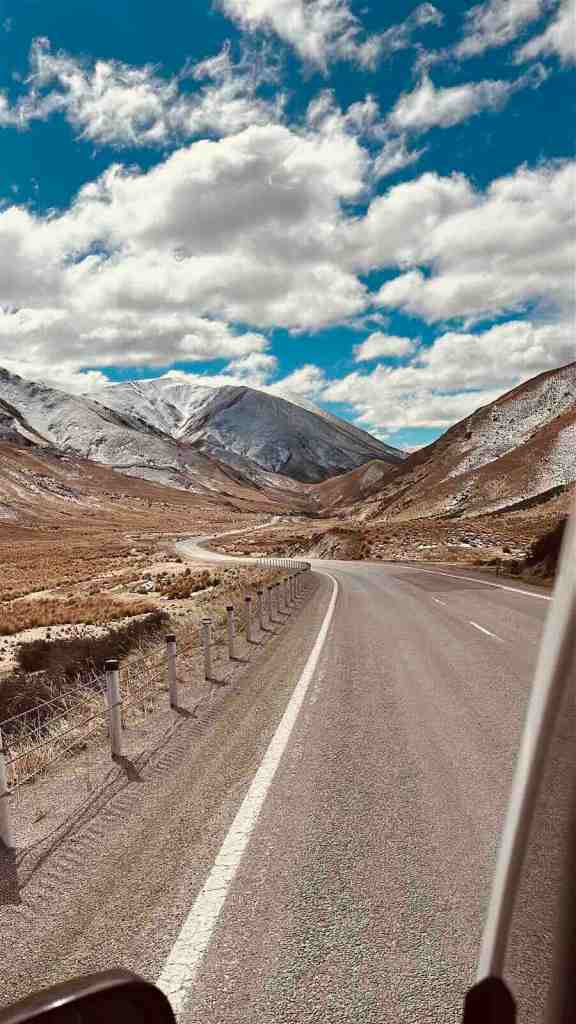
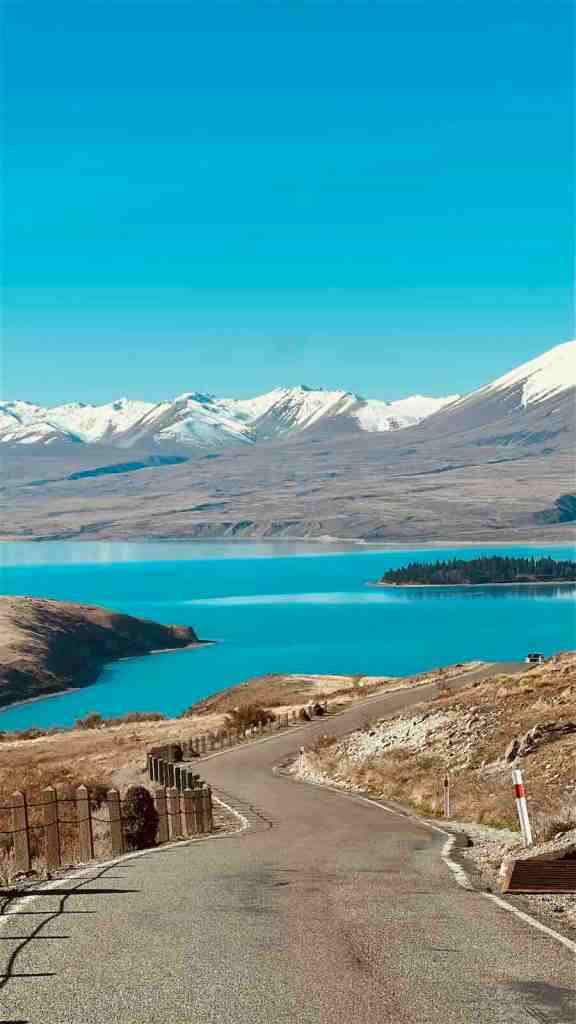
When I was researching the route online, I kept seeing other travellers recommend doing the South Island anticlockwise, particularly if you’re starting in Christchurch. One of the reasons is the way the scenery builds.
You start by crossing the Southern Alps through Arthur’s Pass, then hit the wild West Coast with its rainforest, rugged beaches and glaciers. From there, the scenery becomes increasingly alpine as you drive through Haast Pass towards Wānaka and Queenstown.
After Queenstown, our route turned inland through Central Otago and Lindis Pass before reaching Lake Pūkaki, Aoraki/Mount Cook and Lake Tekapo. I loved ending the road trip this way because some of the biggest mountain scenery came right at the end.
That appealed to me much more than starting immediately with Mount Cook and Tekapo, which are arguably two of the biggest visual highlights of the entire South Island.
Your fixed bookings still matter. Things like a Milford Sound cruise, ski day, skydive or campsite reservation may ultimately decide which direction works best.
For us, the anticlockwise route also made logistical sense because we finish with Lake Pūkaki, Mount Cook and Lake Tekapo, meaning that during the final days of the trip we’re naturally getting closer to Christchurch again. I much prefer that to spending the last day of the road trip somewhere on the West Coast with the Southern Alps sitting between me and the campervan return depot. Especially when September weather has the ability to casually close a mountain pass.
So while either direction works, for this particular itinerary I’d choose anticlockwise again. The route flows well, the scenery gradually becomes more dramatic and the final stretch through Mount Cook and Tekapo feels like a pretty spectacular way to end a South Island road trip.
If you want to see exactly how I turned this into a workable route, I’ve mapped everything out in my 10-Day New Zealand South Island Itinerary, including our day-by-day route, driving times, scenic roads, hikes, activities and where we stopped overnight.
My Rule for Choosing Your Direction
My Rule for Choosing Your Direction: Plot the things you cannot easily move first:
- Accommodation bookings
- Campervan pickup and return
- Milford Sound cruise
- Ski days
- Skydives
- Great Walk bookings
- Expensive tours
Don’t Underestimate Driving Times in New Zealand
Google Maps can be slightly dangerous when you’re planning an ambitious New Zealand road trip. A route might technically take three hours, but that doesn’t account for the waterfall you didn’t know existed, the lake that suddenly appears beside the road, the scenic lookout you obviously have to stop at, or the inevitable coffee break somewhere along the way.
Driving also tends to be slower than you might expect, particularly on the South Island. Many roads are narrow, winding or mountainous, and travelling in a larger campervan naturally takes longer than driving a normal car. This is especially noticeable on roads through places like Arthur’s Pass, Haast Pass, the Crown Range and Milford Sound.
For that reason, I tried to keep most of our driving days to around two to three hours of actual driving, leaving enough time to stop along the way without constantly watching the clock. Wilderness also recommends keeping slower road-trip days to around 150 kilometres or less where possible, particularly if you actually want time to experience the places you’re driving through.
Plan your route around how much of each day you actually want to spend driving. We covered around 1,800 km in 10 days, averaging about 180 km per day, and for us that felt like the perfect balance between seeing a lot and not spending the entire trip behind the wheel.
Remember That the Drive Is Part of the Trip
One of the biggest differences between planning New Zealand and planning a normal city trip is that some of the most beautiful places aren’t necessarily destinations.
They’re roads.
Our itinerary includes scenic routes such as:
- SH73 through Arthur’s Pass
- SH6 along the West Coast
- Haast Pass
- Crown Range Road
- Queenstown to Glenorchy
- Kawarau Gorge
- Lindis Pass
- SH80 alongside Lake Pūkaki toward Aoraki/Mount Cook
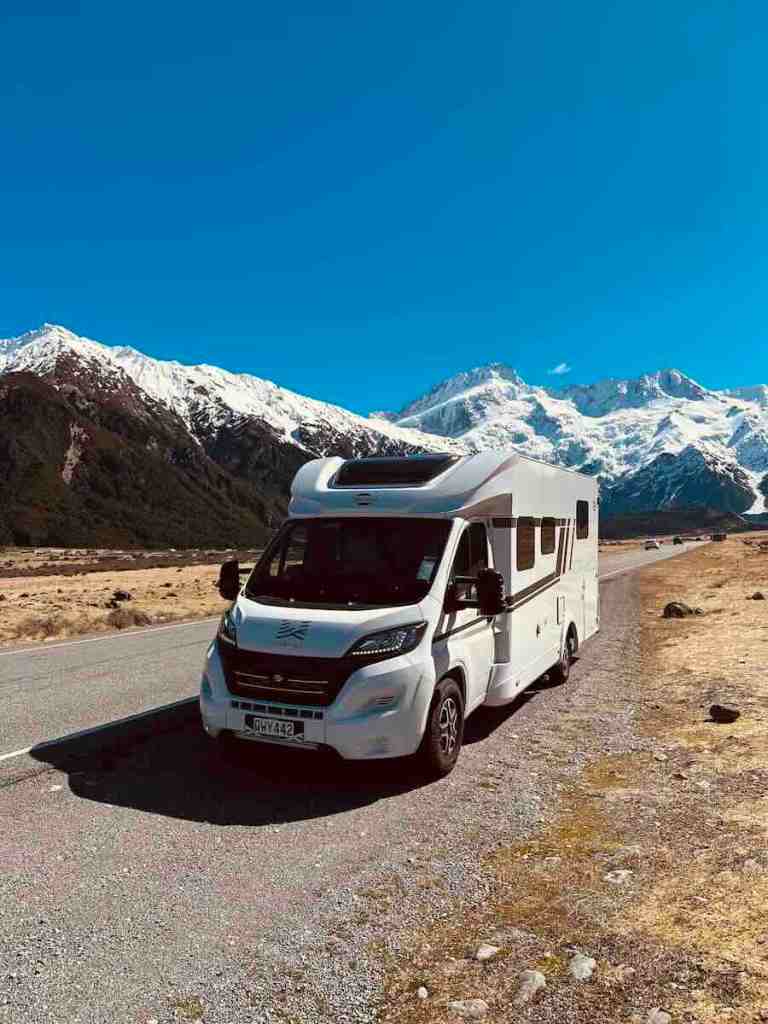

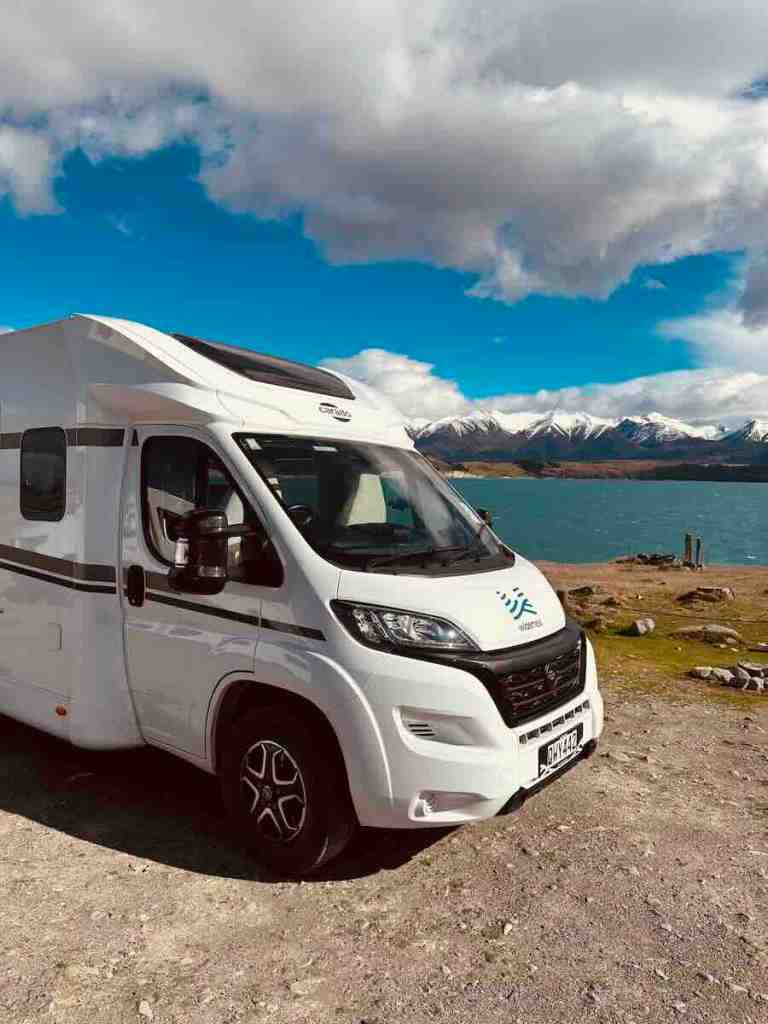
These aren’t just ways of getting from Point A to Point B. They’re part of the road trip.
When I calculate driving times, I therefore add plenty of extra time for viewpoints, waterfalls, short walks and completely unplanned stops. Otherwise you’ll spend half of New Zealand saying, “Oh my God, look at that,” while driving straight past it.
All of these roads are built into our 10-Day New Zealand South Island Itinerary, where I’ve included the driving distances, approximate times and major stops along each section so you can see how they actually fit together as one loop.
Don’t Try to See the Entire South Island in 10 Days
This was probably the hardest part of planning our route. Because naturally I wanted everything.
The West Coast. Queenstown. Milford Sound. Mount Cook. Tekapo. Kaikōura. Marlborough. The Catlins. Akaroa. Vineyards. Glaciers. Skiing. Hiking. Possibly a sheep. Unfortunately, geography exists.
We only have around ten days, so at some point I had to start cutting places from the itinerary.
If every day involves five hours of driving just so you can photograph another town and immediately leave again, you’re not really experiencing much of anything.
In the end, we decided to cut Milford Sound for a few reasons. With the way our itinerary was set up, it would have meant around five hours of driving there and another five hours back, all for one stop. That was simply too much time in the car and would have made the rest of the trip feel rushed. For our sanity, and especially for my boyfriend who was doing the driving, we cut it. It was a hard choice at the time, but in the end, it made the whole road trip much more enjoyable.
Still deciding what actually deserves a place on your route? I’ve also put together my Must-See Spots in New Zealand’s South Island, covering the places I think are genuinely worth building a road trip around, from Arthur’s Pass and the West Coast to Wānaka, Mount Cook and Lake Tekapo.
WEATHER & ROAD CONDITIONS
Always Check the Weather and Road Conditions
Weather was probably the biggest variable I considered when planning our South Island road trip, especially because we travelled in September and crossing several alpine areas along the way.
Our route takes us through Arthur’s Pass, Haast Pass, Crown Range Road, Lindis Pass and the road into Aoraki/Mount Cook, so snow, ice, strong winds, heavy rain or even slips can potentially affect our plans.
This is also why I wouldn’t rely solely on Google Maps for road conditions.
Before heading through an alpine area, I would check the official NZTA Journey Planner. It provides current information about road closures, incidents, delays, roadworks and highway conditions throughout New Zealand.
This is especially important if you’re travelling during winter or shoulder season. A road that was perfectly fine yesterday can look very different after a night of snow.
Check Milford Road Before Leaving Te Anau
Milford Road deserves a little extra attention because SH94 crosses a proper alpine environment between Te Anau and Milford Sound.
Snow, ice and avalanche risk can affect the road, particularly outside summer, and drivers may be required to carry or fit snow chains depending on the conditions. NZTA recommends carrying chains during winter and has road condition signs along the route showing whether the road is open and what the current avalanche risk is.
Before driving to Milford Sound, I would check the official NZTA Milford Road travel information as well as the NZTA Journey Planner.
During our September road trip, checking the weather and road status will basically become part of the morning routine.
Check Arthur’s Pass Before Crossing the Southern Alps
Arthur’s Pass deserves some extra attention too, particularly if you’re travelling outside summer. State Highway 73 crosses the Southern Alps between Canterbury and the West Coast and can be affected by snow, ice and rapidly changing alpine weather.
During snowy conditions, sections of SH73 can temporarily close, snow chains may be required and towing vehicles can be restricted. This isn’t just a mid-winter problem either. Snow has affected Arthur’s Pass well into spring, so I definitely wouldn’t assume the road will be clear just because you’re travelling in September.
Before crossing Arthur’s Pass, I would check the official NZTA Journey Planner for current road conditions, closures and chain requirements.
We’re driving Arthur’s Pass right at the beginning of our trip, so this will be one of the first roads I check before leaving Christchurch.
Check Haast Pass Before Driving Between the West Coast and Wānaka
Heavy rain is probably the biggest thing to watch out for here. Flooding, surface water and landslides can affect SH6, and the Haast Pass section can temporarily close when conditions become unsafe.
And this is almost exactly what happened to us.
By the time we arrived, most of the landslides had already been cleared, but major repairs were still underway. Because of that, traffic was only being allowed through in three escorted convoys per day. So you either made your convoy, or you waited for the next one. This unfortunately meant cutting a few mayor on the road-stops in order to make our convoy.
During our September 2026 trip, the north-to-south convoys were at 7:15, 12:15 and 18:15, while the south-to-north convoys left at 7:45, 12:45 and 18:45. These were temporary roadworks arrangements, so always check the current NZTA Journey Planner rather than relying on these times for a future trip.
The convoy meant we could still make it through Haast Pass, which we were extremely grateful for, but there was one downside: we were not allowed to stop at any of the scenic viewpoints along the way. A bit of a bummer on one of the most beautiful stretches of road in New Zealand.
Still, it could have been much worse. If the road had been completely closed, we would have had to turn around and essentially drive the South Island loop the other way to reach Wānaka, adding roughly 16 hours of driving. Suddenly missing a few viewpoints didn’t feel quite so tragic.
Leave Some Flexibility for Bad Weather
One thing I really didn’t want to do was create an itinerary so rigid that one rainy day destroyed the entire trip.
The South Island has too many weather-dependent activities for that.
A hike at Mount Cook, skiing in Wānaka, a scenic flight, a skydive or even simply seeing the mountains properly can all depend heavily on the weather.
So when I planned our route, I mentally divided everything into two categories.
Fixed Plans
These are things that either cost money, sell out or are difficult to move:
- Campervan pickup and return
- Milford Sound cruise
- Skiing
- Skydiving
- Certain DOC campsites
- Popular tours
- Any accommodation that needs to be booked in advance
Flexible Plans
These are much easier to move around:
- Hikes
- Scenic viewpoints
- Waterfalls
- Town visits
- Lake stops
- Short walking trails
- Wine tasting
- Scenic drives
If the weather looks terrible in one area but much better somewhere else, having some flexibility gives you the possibility of changing the order.
You don’t need to leave entire days completely empty, but I definitely wouldn’t schedule every hour of a South Island road trip.
CAMPERVAN VS CAR
Choose the Right Campervan for Your New Zealand Road Trip
Campervan or Rental Car for the South Island?
You absolutely don’t need a campervan to explore New Zealand.
Renting a car and staying in hotels is easier in some ways. You have a smaller vehicle, you don’t need to worry about water tanks or toilets, and parking in towns is much simpler.
But for the type of South Island road trip we wanted, a campervan made much more sense.
A lot of the places we visited were far from major towns, and having our accommodation with us meant we could stay much closer to nature instead of constantly driving back to hotels.
It also gave us much more flexibility.
If we wanted to spend longer around Lake Pūkaki, Haast Pass, Wānaka or Mount Cook, we weren’t tied to checking into a hotel in another town at a specific time. You wake up, make coffee, pack away approximately seventeen objects that have somehow moved during the night, and drive off.
Why I Chose Wilderness Motorhomes
For our South Island road trip, I chose Wilderness Motorhomes, but there are plenty of other campervan rental companies in New Zealand, including Apollo, Maui, JUCY, Britz, Mighty Campers, Travellers Autobarn and Spaceships. Prices and vehicle styles vary quite a bit, from basic two-person campervans to large, fully equipped motorhomes, so it’s worth comparing a few before booking.
My priority wasn’t simply finding the cheapest campervan available. We’re travelling for ten days in September, when nights can still get very cold around the mountains, so I wanted something we would actually be comfortable living in.
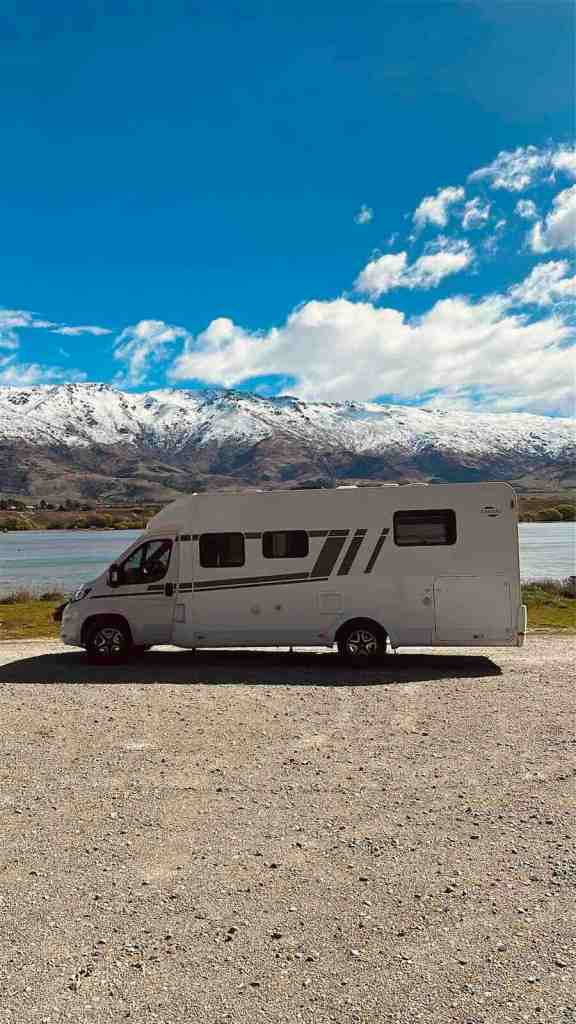
Wilderness stood out because their vehicles are more like proper small motorhomes than basic converted vans. They are the more luxurious choice, and have heating, a proper kitchen, bathroom, fixed toilet, good storage and considerably more indoor living space.
Their entire fleet is also certified self-contained, which was very important to me because we wanted the option of using freedom camping areas during the trip.
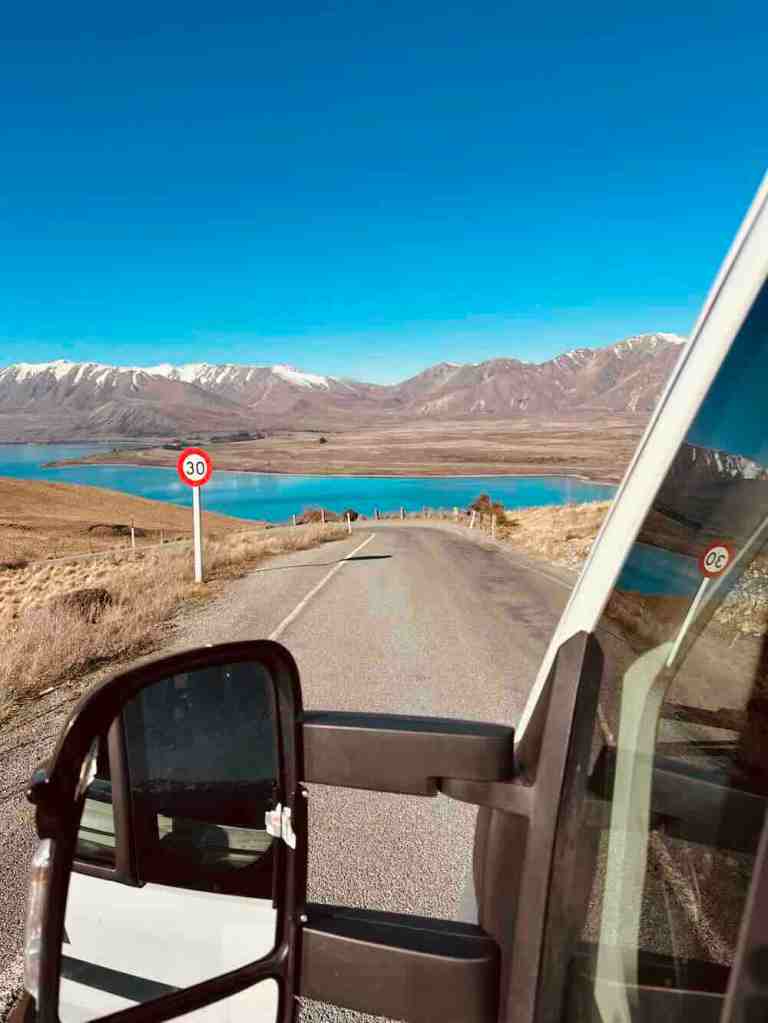

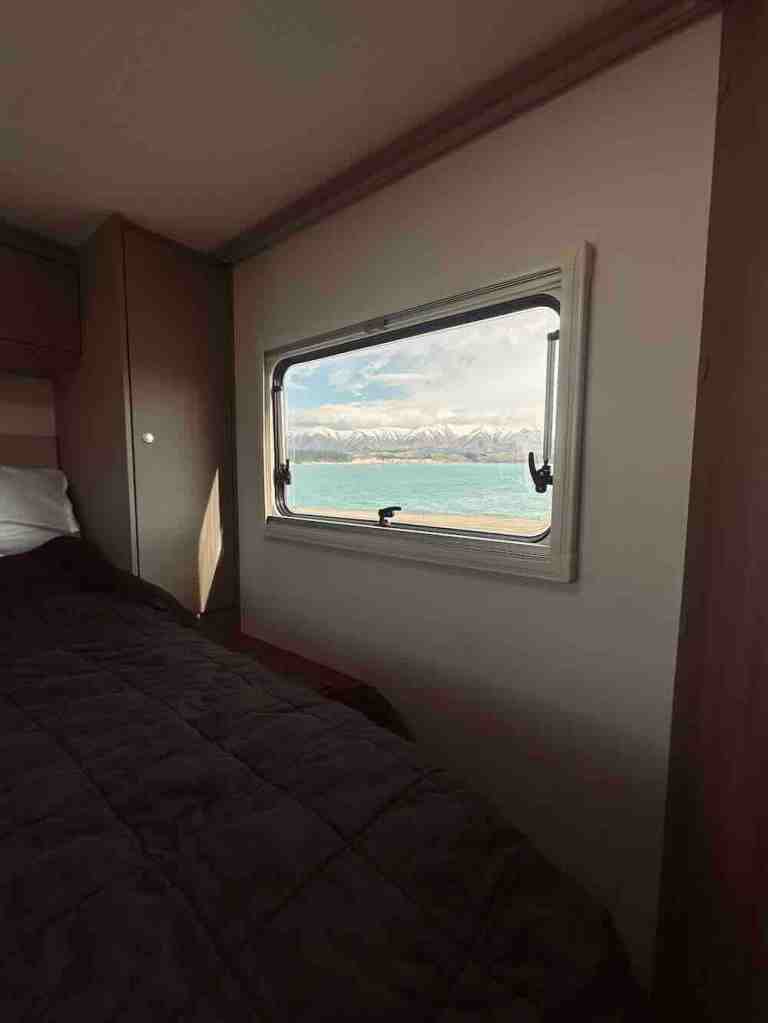
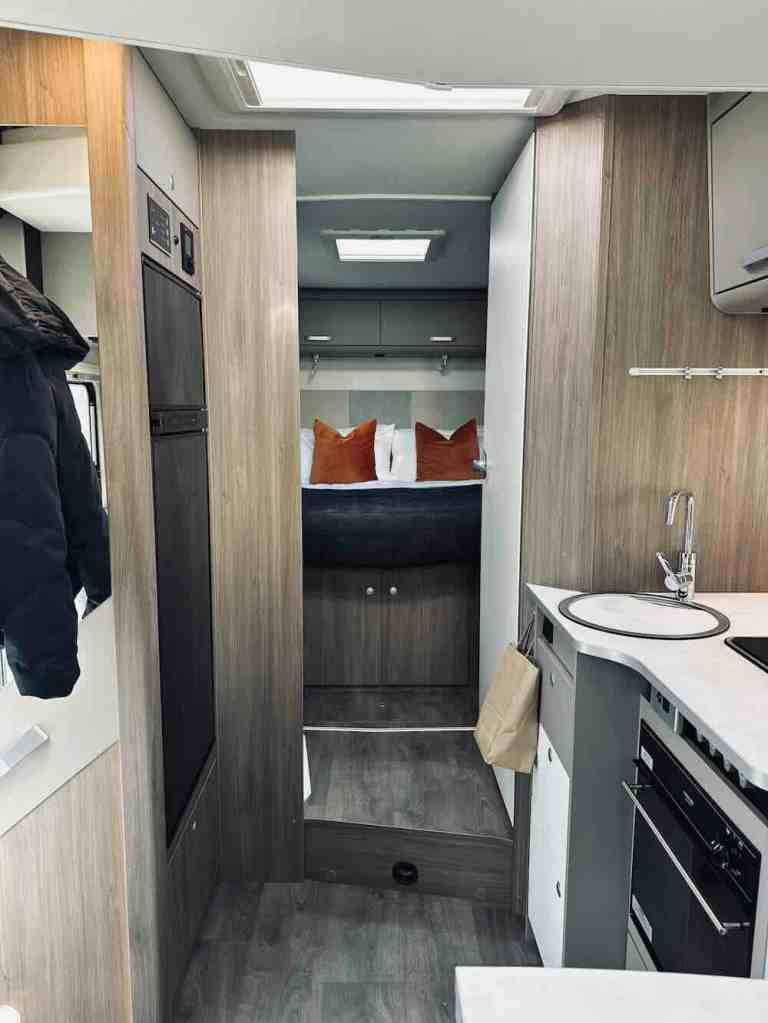
During our trip, we ended up with a dead battery one day, but Wilderness’ 24/7 roadside assistance had it sorted within an hour. We also managed to hit the side mirror on a rather enthusiastic tree branch, and the mirror eventually fell out. Thankfully, that was fully covered too. Very glad we had the proper insurance at that point.
That doesn’t mean Wilderness will be the right choice for everyone. There are definitely cheaper campervans available in New Zealand, Jucy being the popular choice for backpackers for example. But if you’re spending ten days living inside a vehicle, I personally think comfort, heating, insurance, storage and what is actually included in the price matter just as much as the headline daily rate.
I’ll be doing a full tour of our actual Wilderness motorhome too, because there is a big difference between seeing a list of features on a rental website and actually living in one for ten days. In my New Zealand Campervan Tour + 10-Day RV Road Trip Cost, I’ll show exactly how the bed, kitchen, bathroom, toilet, heating, electricity, water tanks and off-grid setup work, plus what the RV actually cost us to rent and run around the South Island.
Things to Check Before Renting a Campervan in New Zealand
Whichever rental company you choose, I would check:
- Is the vehicle certified self-contained?
- Does it have the current Green Warrant?
- Is the toilet permanently installed?
- Does it have heating?
- Can the heating work while you’re camping off-grid?
- Is there an indoor shower?
- Does it have hot water?
- How large are the freshwater and wastewater tanks?
- Are kilometres unlimited?
- Are additional drivers included?
- Are snow chains included or available?
- What is the standard insurance excess?
- Are Road User Charges included?
- Is roadside assistance included?
- Are windscreen and tyre damage covered?
- What time must you return the vehicle?
- Is airport or hotel pickup included?
A campervan that looks cheaper initially can become considerably more expensive once all the extras are added.
What Does Certified Self-Contained Mean in New Zealand?
If you’re planning on freedom camping, this is something I would understand before booking your campervan.
A certified self-contained vehicle is designed to allow its occupants to live inside it without relying on external toilets or waste facilities for several days. That includes having things such as freshwater storage, wastewater storage, a rubbish bin and a proper toilet.
The rules have recently changed.
From 7 June 2026, vehicles using self-containment certification must meet the new requirements and display a Green Warrant. Portable toilets are no longer sufficient for certification. The toilet has to be fixed inside the vehicle.
The Department of Conservation’s freedom camping guide explains the current self-containment rules and the different camping signs you’ll see around New Zealand.
This matters because many freedom camping locations are only available to certified self-contained vehicles.
So if freedom camping is part of your New Zealand road trip plan, don’t simply assume every campervan qualifies. Check before you book, and check the Green Warrant when you collect it.
The self-contained rules are only one part of freedom camping in New Zealand, though. Where you’re actually allowed to stay changes between regions, councils and individual campsites. I’ve gone much deeper into the rules, campsite types and places to stay in my Freedom Camping in New Zealand South Island: Complete Guide & Best Spots
FREEDOM CAMPING
Understand Camping in New Zealand
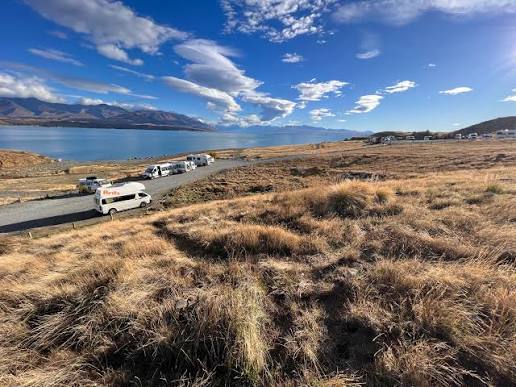
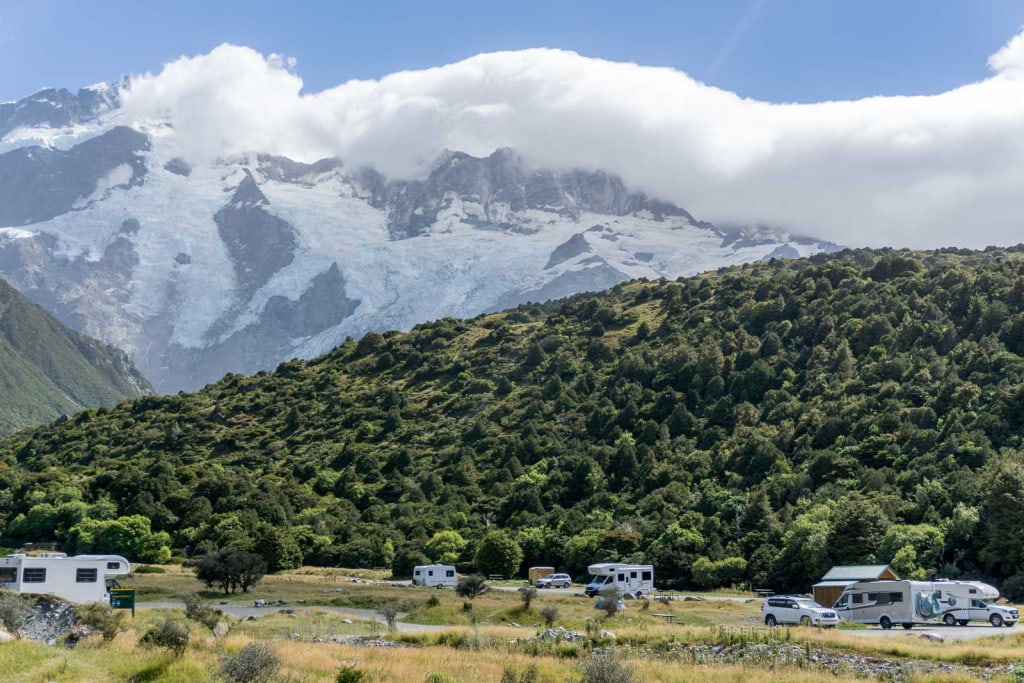
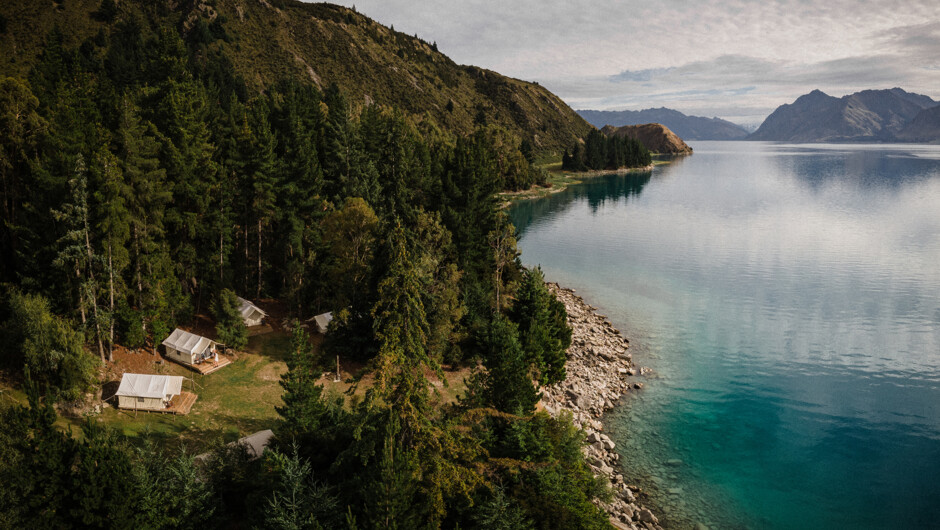
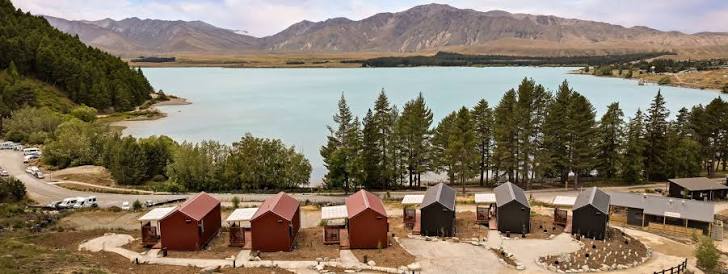
Freedom Camping Does Not Mean You Can Camp Anywhere
This is probably one of the biggest misconceptions about travelling New Zealand by campervan.
Freedom camping does not mean you can find a beautiful lake, pull over beside it and announce that you live there now.
Where you are legally allowed to spend the night depends on who manages the land, local council bylaws and the rules of the specific camping area.
Some places allow freedom camping for certified self-contained vehicles. Others have designated parking spaces, time restrictions or maximum stay limits. And some places ban overnight camping completely.
The Department of Conservation’s official freedom camping information is a good starting point, but you should also check the rules of the local council for whichever area you’re travelling through.
Apps such as CamperMate, Rankers and Camping NZ are extremely useful for finding possible locations, but I would still read the signs when I arrive.
If a freedom camping area has five legal parking spaces and all five are occupied, parking next to them does not magically create space number six. This is why I always save backup camping options.
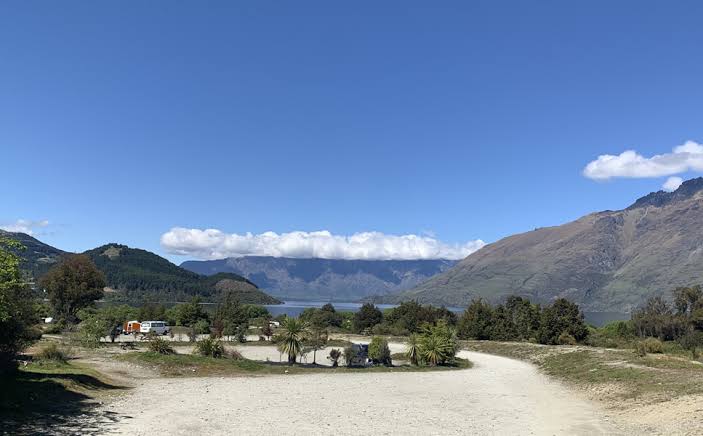
For our own trip, I researched legal overnight options along the entire route rather than simply hoping we’d find somewhere when we arrived. I’ve collected those into my South Island Freedom Camping Guide & Best Camping Spots, including the rules, prices, facilities, whether you need a reservation and backup options around the main stops on our route.
Freedom Camping vs DOC Campsites vs Holiday Parks
We didn’t freedom camp every single night.
In the end, we mixed all three. We freedom camped when the location made sense, used campsites when they fitted nicely into the route, and stayed at holiday parks when we needed to recharge everything, empty the tanks, wash our clothes and deal with the slowly growing collection of damp towels.
Each has a different purpose. And sometimes you want to simply connect to electricity for convenience.
Freedom Camping
Freedom camping is usually the cheapest option and can sometimes put you in incredible locations.
The downside is that facilities may be extremely limited or completely nonexistent.
If you have a certified self-contained motorhome, that’s less of a problem because you already have your own water, toilet and cooking facilities onboard.
DOC Campsites
The Department of Conservation manages more than 320 campsites across New Zealand, many of them in national parks and beautiful remote locations.
They range from extremely basic sites with little more than toilets and water to serviced campgrounds with showers and other facilities.
You can search them using the official DOC campsite finder.
DOC currently separates campsites into several categories.
Basic campsites have very limited facilities and are free.
Standard campsites usually have toilets, water and vehicle access and generally cost around NZ$10 to NZ$20 per adult per night.
Serviced campsites offer more facilities, which may include flush toilets, hot showers, cooking areas and rubbish collection. Unpowered sites generally cost around NZ$25 per adult per night.
Prices can vary by campsite or season, so always check the individual listing. The latest category prices are listed on the DOC campsite facilities and fees page.
Holiday Parks
Holiday parks are the more comfortable option and are useful every few nights, especially if you’ve been freedom camping.
Depending on the park, you can usually find:
- Powered campervan sites
- Hot showers
- Kitchens
- Laundry facilities
- Freshwater
- Dump stations
- Wi-Fi
Freedom camp when the location is worth it, use DOC campsites when they fit nicely into the route, and occasionally book a holiday park to recharge everything, empty the tanks, wash our clothes and address the slowly growing collection of damp towels.
Do You Need to Book DOC Campsites?
Some DOC campsites need to be booked, while others operate on a first-come, first-served basis.
The individual listing on the DOC campsite finder tells you whether a campsite requires a reservation, how much it costs and what facilities are available.
At bookable campsites, you should reserve your space before arriving. DOC explains the different reservation and payment systems in its Booking and Paying for a Campsite guide.
Non-bookable campsites generally work on a first-come, first-served basis.
For those, I would always save a backup nearby.
Turning up somewhere at 9 pm, discovering the campsite is full and then trying to figure out where you can legally sleep is not really the kind of spontaneity I’m looking for.
Is the DOC Campsite Pass Worth It?
If you’re travelling around New Zealand for a longer period and planning to stay at lots of DOC campsites, it may be worth looking at the DOC Campsite Pass.
The current annual pass costs NZ$295 per adult and is valid for one year.
It can be used at many bookable and non-bookable DOC campsites around New Zealand, although some campsites and dates are excluded.
For a longer trip, it could save quite a bit of money.
For a shorter road trip like ours, where we mixed freedom camping, DOC campsites and holiday parks, I would simply calculate the price of the individual campsites first.
Also remember that the pass does not guarantee you a space.
If a participating campsite requires a reservation, you still need to book it. If it’s a non-bookable campsite, spaces remain first come, first served.
Always Save a Backup Campsite
This became one of my biggest rules while planning the trip.
For every night, I tried to save:
Plan A: Where I actually want to stay
Plan B: Another legal camping option nearby
Plan C: A paid campsite or holiday park if everything else fails
Freedom camping areas can have surprisingly few spaces. Some of the places I found only allow three, five or ten campervans.
If you arrive late and they’re full, you need another legal option.
I’d much rather spend five minutes saving a backup campsite beforehand than drive around in the dark trying to decipher council camping bylaws.
LOGISTICS
Sort Out the Practical Campervan Logistics
Best Apps for a New Zealand Road Trip
There are a few apps I would download before collecting the campervan.
Mobile reception can disappear quickly once you get into parts of Fiordland, the West Coast and more remote areas of the South Island, so I wouldn’t leave this until you’re already on the road.
CamperMate
CamperMate is probably the first app I would download for a New Zealand campervan road trip.
It can help you find:
- Free and paid campsites
- Freedom camping areas
- Public toilets
- Dump stations
- Drinking water
- Showers
- Activities
- Holiday parks
It also offers offline maps. Download them while you have Wi-Fi, because CamperMate recommends doing this before travelling outside mobile coverage.
Camping NZ by Rankers
I would also download Camping NZ by Rankers.
It includes more than a thousand camping locations around New Zealand, including freedom camping areas, DOC campsites and holiday parks.
I particularly like that it includes traveller reviews and offline maps, because sometimes a place that looks very romantic on Google Maps turns out to be a gravel car park beside a public toilet.
Useful information.
NZTA Journey Planner
The NZTA Journey Planner is the one I would use for actual road conditions.
It shows:
- Road closures
- Roadworks
- Incidents
- Delays
- Highway conditions
- Traffic cameras
During our September trip, we checked it regularly before driving across mountain passes.
MetService
For weather, I would use MetService, New Zealand’s official weather service.
The MetService app provides local forecasts, real-time radar and official severe weather warnings.
When your accommodation happens to have wheels, severe weather alerts become slightly more interesting.
Google Maps
Google Maps is obviously still extremely useful for general route planning and navigation.
But download your South Island areas offline before you leave Christchurch.
Do not wait until you’re somewhere between Haast and Wānaka to discover that your phone has suddenly decided the internet is optional.
Gaspy
Fuel prices can vary quite a bit between stations, so Gaspy is another useful app to have.
It uses crowdsourced fuel prices to help you compare petrol and diesel stations nearby.
With a large campervan and a long South Island road trip, even relatively small differences in fuel prices can start adding up.
Plan Where to Refill Water and Empty Waste
One thing you don’t really think about until you own a tiny moving bathroom is how often you need to manage everything inside it.
If you’re travelling in a self-contained campervan, you will periodically need to:
- Refill freshwater
- Empty grey water
- Empty the toilet cassette
- Dispose of rubbish
- Recharge the leisure battery
- Refill LPG if necessary
Apps like CamperMate are useful for finding dump stations and water points.
I wouldn’t leave all of this until every warning light appears at the same time.
Instead, I would naturally build a proper service stop into the route every few days.
Holiday parks are also useful for this because many provide freshwater, dump stations, powered sites and laundry facilities all in one place.
And obviously, never empty wastewater anywhere except an authorised dump station.
Nobody came all the way to New Zealand to admire your grey water.
Don’t Let the Fuel Tank Get Too Low
Another important thing to consider is that on the South Island, you can travel for long stretches through remote areas with relatively few fuel stations.
This is particularly relevant around:
- The West Coast
- Haast
- Milford Road
- Mount Cook
- Inland Otago
I wouldn’t wait until the fuel warning light comes on before starting to look for a petrol station.
If you’re leaving a reasonably sized town and you know you’re heading into a remote area, fill up.
It is one of those boring decisions that becomes extremely exciting once you ignore it.
COSTS
Budget for Your New Zealand Road Trip
How Much Does a New Zealand Campervan Road Trip Cost?
The cost of a New Zealand road trip can vary enormously depending on the season, campervan, insurance, campsites, fuel and how many expensive activities you mysteriously decide are “once in a lifetime”.
One of the reasons we chose September was that it falls in the shoulder season.
According to the current Wilderness Motorhomes pricing guide, estimated September rates for a standard 5 to 20-day rental are roughly NZ$300 to NZ$400 per day, depending on the motorhome and availability.
For comparison, some January rates can reach NZ$700 to NZ$850+ per day. That is quite a difference.
For a New Zealand campervan road trip, I would budget for:
| Expense | Approximate Cost |
|---|
| Campervan rental | Around NZ$300-400+ per day in September |
| Campervan insurance | Depends on cover |
| Basic DOC campsite | Free |
| Standard DOC campsite | Around NZ$10-20 pp/night |
| Serviced DOC campsite | Around NZ$25 pp/night |
| Freedom camping | Usually free |
| Holiday parks | Varies by location |
| Fuel | NZ$400-NZ$650 |
| Groceries | NZ$500-NZ$750 |
| Activities | NZ$1500-NZ$2500 |
One extra cost to check with diesel campervans is Road User Charges, or RUC.
Wilderness currently charges NZ$0.084 per kilometre for diesel vehicles unless you choose its Full Cover package, in which case the Road User Charges are included.
For example, a 2,000 km road trip would otherwise add roughly NZ$168 in RUC.
This is exactly why I wouldn’t compare campervan companies based only on the advertised daily rental price. Look at what is actually included.
I’ve also broken down what the campervan actually cost us rather than relying on theoretical budgets. My New Zealand Campervan Tour + 10-Day RV Road Trip Cost includes the rental, insurance, diesel, Road User Charges, campsites and other RV-related expenses, along with the final cost per day and per person.
Think Carefully About Campervan Insurance
Campervan insurance is one area where I personally wouldn’t just automatically choose the cheapest option.
You’re driving a large unfamiliar vehicle on roads that can be narrow, mountainous and occasionally full of other people driving large unfamiliar vehicles.
Wilderness includes comprehensive insurance in the standard rental rate, but the standard cover currently comes with an NZ$7,500 liability.
According to the Wilderness Motorhome Insurance page, you can currently reduce that to NZ$500 with Extra Cover or NZ$0 with Full Cover.
Their Full Cover costs NZ$84 per day and also currently includes extras such as Road User Charges, toll-road fees, an LPG refill and snow chains.
For our September trip, snow chains were particularly relevant because we travelled through several alpine areas.
Whichever campervan company you use, I would check whether the insurance covers:
- Windscreen damage
- Tyres
- Overhead damage
- Underbody damage
- Single-vehicle accidents
- Towing
- Roadside assistance
Also read the exclusions. “Full Cover” doesn’t mean you can reverse into a lake and casually return the keys.
FINAL VERDICT
Is a New Zealand Campervan Road Trip Worth It?
For the South Island, I think travelling by campervan makes enormous sense.
The biggest advantage isn’t necessarily that it’s cheaper than hotels. Depending on the campervan and the season, it may not be.
The advantage is freedom. You can stay much closer to nature, move with the weather and explore areas where accommodation options are limited. But that freedom comes with some responsibility.
You need to understand where you can legally camp, choose the right vehicle, keep an eye on the weather and accept that sometimes the mountains are going to make decisions on your behalf.
Plan the important bits, download the apps, choose a certified self-contained campervan if you want to freedom camp and keep checking the weather and road conditions.
Then leave enough room for New Zealand to completely mess with your plans. Because it probably will. And I have a feeling that’s going to be half the fun.
New Zealand Road Trip Planning FAQ
Can You Freedom Camp Anywhere in New Zealand?
No. Freedom camping is regulated, and the exact rules depend on the land, local council bylaws and individual camping areas. Some locations allow freedom camping, some only permit certified self-contained vehicles and others prohibit overnight camping completely. Check the official DOC freedom camping information as well as local signs and council rules before staying overnight.
Do I Need a Certified Self-Contained Campervan in New Zealand?
Not necessarily. You can travel around New Zealand in a non-self-contained campervan and stay at holiday parks or other campsites that allow it.
However, if you want to use freedom camping areas that are restricted to self-contained vehicles, you need a certified self-contained campervan. From 7 June 2026, qualifying vehicles need to comply with the Green Warrant system and have a fixed toilet.
Is September a Good Time for a South Island Road Trip?
I think so, especially if you prefer fewer crowds and lower campervan prices.
September is early spring and falls within shoulder season, so rental prices can be considerably lower than during the peak summer months. You may also still get snow-covered mountain scenery and potentially some late-season skiing.
The trade-off is unpredictable weather. Snow, rain, wind and icy conditions are still possible, particularly around alpine passes, so September works best if your itinerary has some flexibility.
Do I Need Snow Chains in New Zealand in September?
Potentially. Whether you need to carry or fit chains depends on the route and current weather conditions. Alpine roads can be affected by snow and ice during September, and Milford Road in particular may have chain requirements during colder conditions.
Check the NZTA Journey Planner before travelling through alpine areas and follow any roadside instructions.
Do DOC Campsites Need to Be Booked?
Some do and some don’t. Bookable DOC campsites should be reserved before you arrive, while other campsites operate on a first-come, first-served basis. You can check whether a reservation is required through the DOC campsite finder.
Is the DOC Campsite Pass Worth It?
For a long New Zealand road trip where you plan to stay at lots of DOC campsites, potentially.
The annual DOC Campsite Pass currently costs NZ$295 per adult and can be used at many participating DOC campsites.
For shorter trips, calculate how much your individual campsites would cost before buying the pass.
Which Apps Should I Download for a New Zealand Campervan Road Trip?
My main apps would be:
Gaspy for comparing fuel prices
CamperMate for campsites and campervan facilities
Camping NZ by Rankers for legal camping areas and reviews
NZTA Journey Planner for road closures and highway conditions
MetService for weather
Google Maps with offline maps downloaded
How Far Should You Drive Each Day in New Zealand?
For an enjoyable road trip, I would aim for around two to three hours of scheduled driving on most days, with a few longer days when necessary.
We covered around 1,800 km during our 10-day South Island road trip, averaging roughly 180 km per day. For us, that felt like the perfect amount. We still covered a huge part of the island without feeling like the entire holiday happened through a windscreen.
Distances that look short on Google Maps can also take much longer once you factor in winding roads, campervan speeds, roadworks and scenic stops. The aim isn’t to cover as many kilometres as possible. It’s to actually enjoy the road trip.
Is Clockwise or Anticlockwise Better for a South Island Road Trip?
Both work, but we travelled anticlockwise from Christchurch.
Our route took us through Arthur’s Pass and down the West Coast first, before continuing through Wānaka, Queenstown, Central Otago, Aoraki/Mount Cook and Lake Tekapo.
I loved the way the scenery gradually built towards some of the biggest alpine landscapes later in the trip, and finishing around Mount Cook and Tekapo also meant we were naturally getting closer to Christchurch again before returning the campervan.
EXPLORE MORE
Continue Exploring New Zealand
Rote is much easier to plan once you understand how spread out everything is. Use my other Rote guides below to work out where to base yourself, which beaches are actually worth the drive and how to fit everything into one trip.
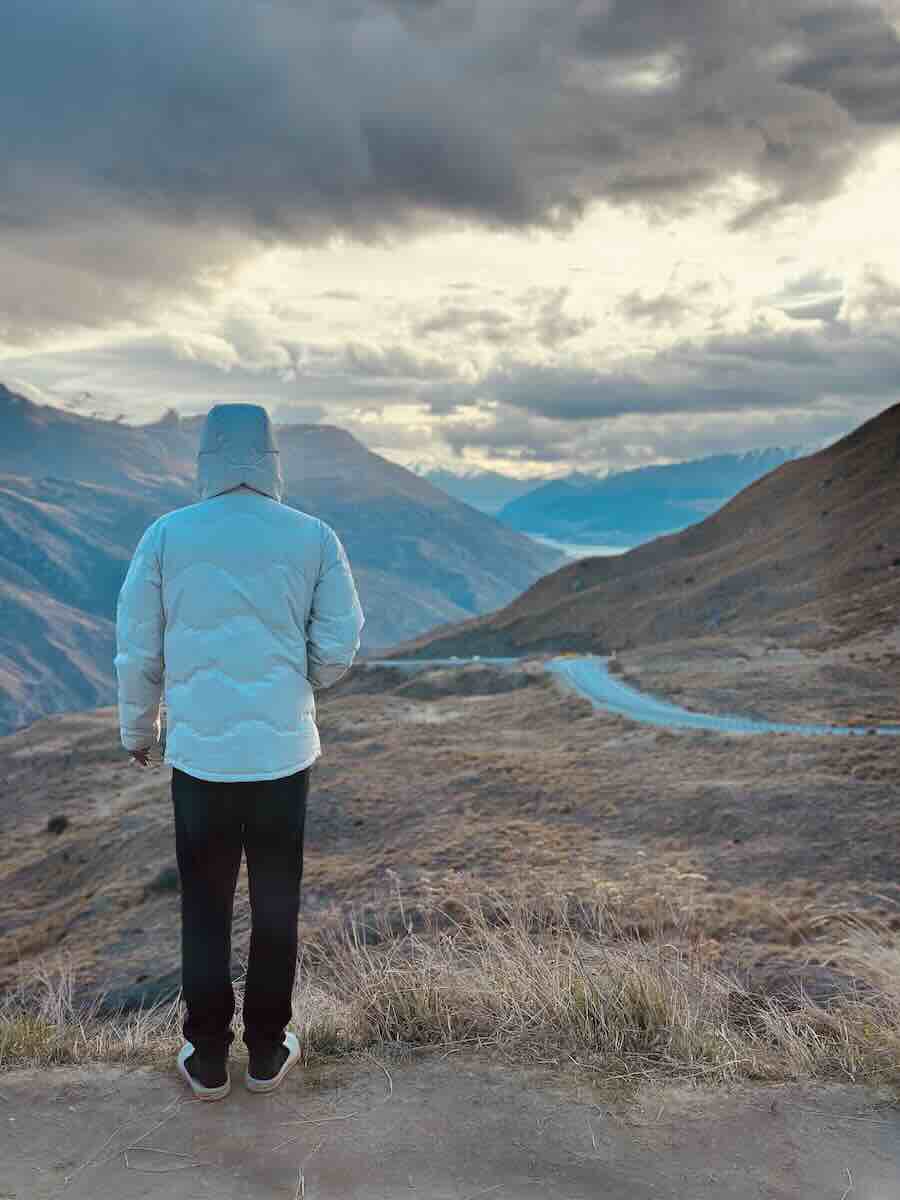
Weather, visas, transport, costs & general info
New Zealand South Island Travel Guide
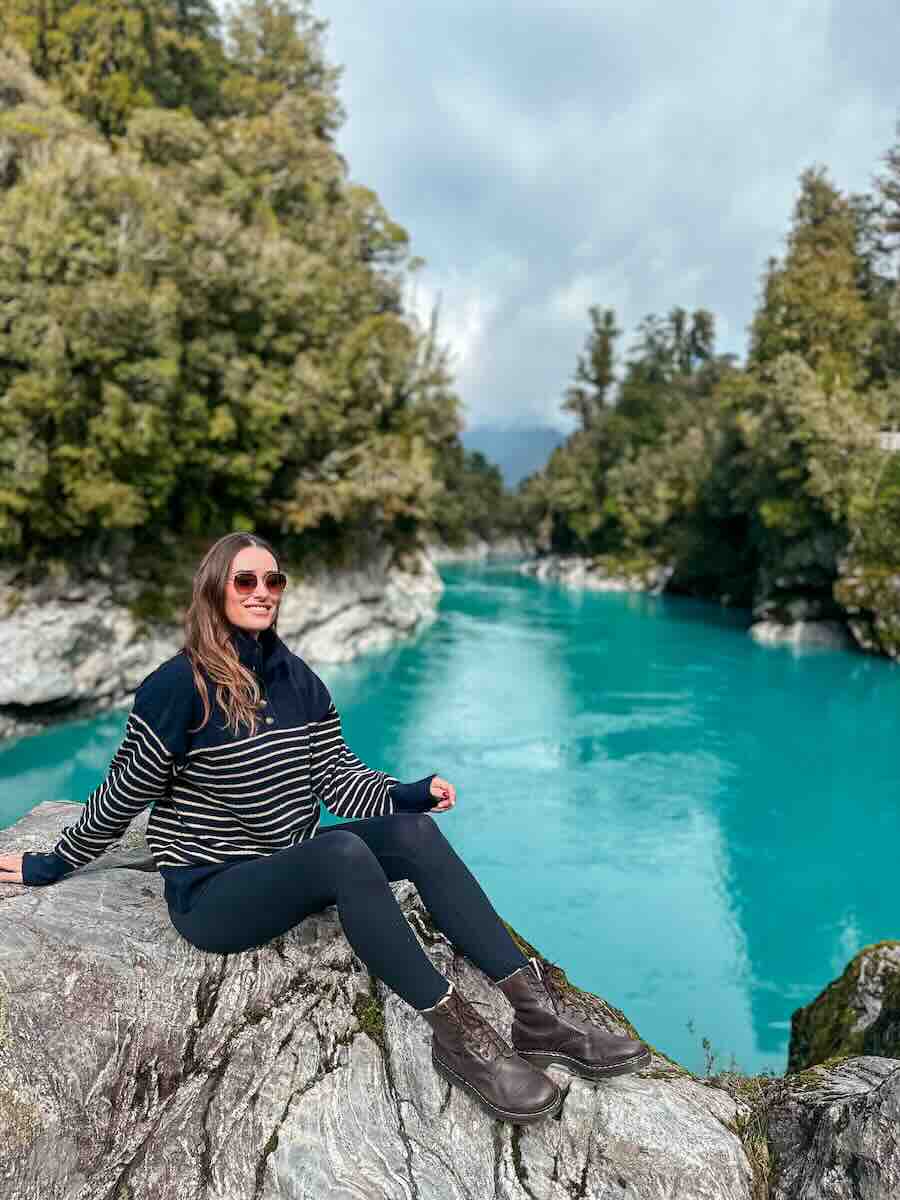
Our complete day-by-day route.
My 10-Day New Zealand South Island Itinerary
The places I would actually prioritise
Best Places to Visit in New Zealand’s South Island
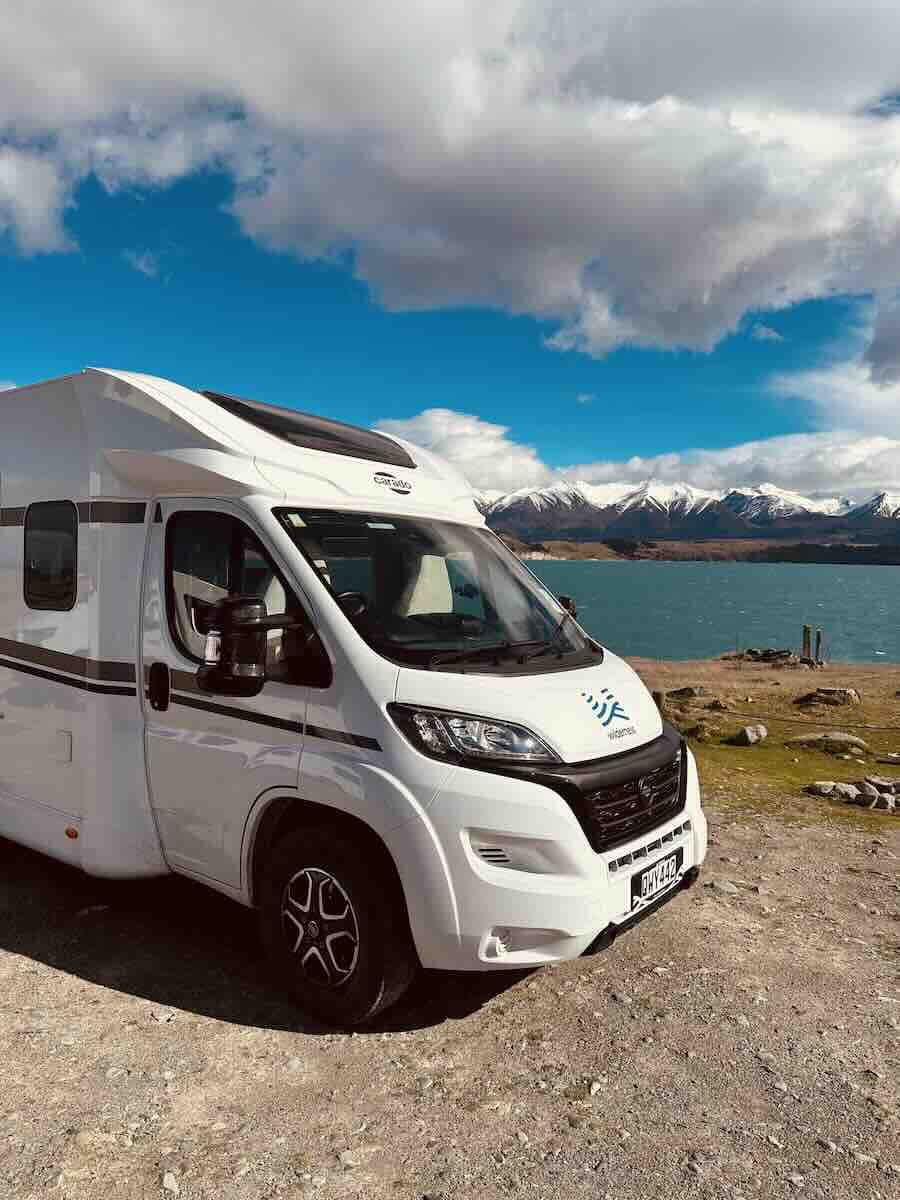
Camping rules, DOC campsites and our best overnight spots
Freedom Camping in New Zealand South Island Explained & Best Camping Spots
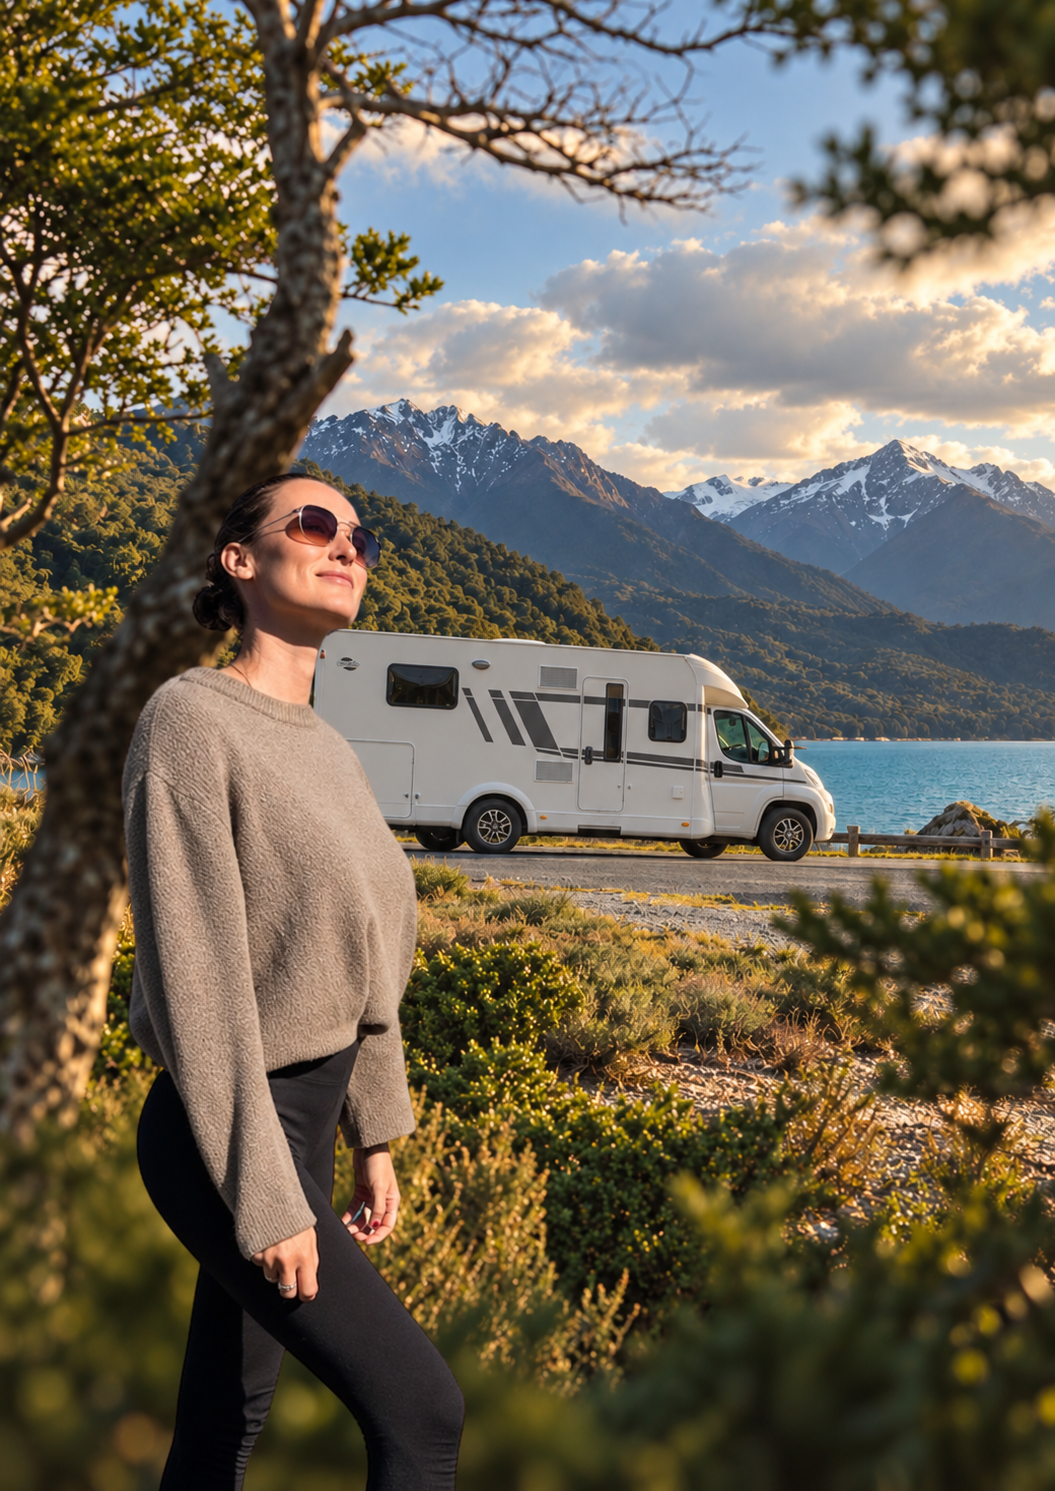
The full RV tour and what traveling the South Island actually cost us
Our New Zealand Campervan Tour + 10-Day RV Road Trip Cost




NEWSLETTER
Subscribe for travel tips, new vlogs & life behind the scenes.
© 2026 Keep Up With Car – All rights reserved.
